Carbuilder
Silver forum user
- Messages
- 71
Progressing here from "let's discuss it" to "let's actually do it!".
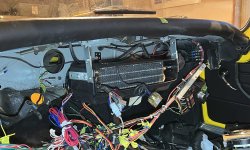
I bought the Vintage Air under-dash unit. This is heat and A/C:
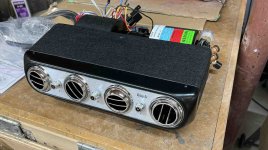
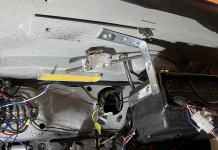
And of course we must take things apart:
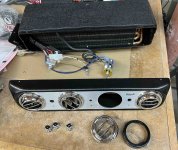
The idea is to mount the unit behind the new dash and put the outlets in the dash. The controls would also be mounted in the dash. So it is sort of like taking the whole front panel from the unit and mounting it in the dash. But I don't want the look of a separate unit poking through the dash, or hanging under it.
I modelled the original dash on the computer and then modified it to suit. This is what I have now. The ends are unchanged from the stock dash. The changes start where the dash drops down for the vents and radio:

This incorporates the gauges that are currently in the dash, the A/C vents and controls, a place for a radio, and places for the various switches. I've always liked the look of rocker switches on a dash (love the XKE's with the long row of rocker switches!). I bought these switches from New Wire Marine:
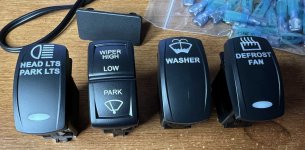
They come in various electric configurations depending on how many circuits you want to control and how you want them controlled. And the neat thing is that they have dozens of different switch covers with various labels, but you can also create your own. You mock it up on their website and they make it. The head light and defrost are custom ones I did.
The plan is to have the headlight switch at the top near the small gauges, the wiper and washer beside the radio, and the defrost and a blank on the left. That of course may change, but that's the plan right now.
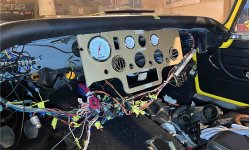
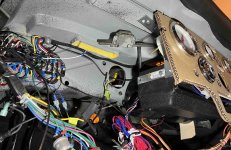
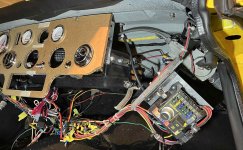
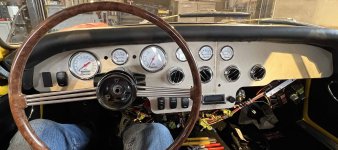
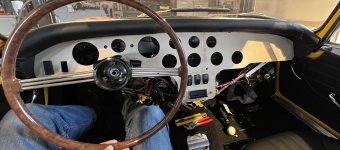
To see how this looks and fits I made a mockup of it. I realize the dash outside of the central part is not changing, so no need to mock that up. I made a centre piece from cardboard and mounted some of the gauges and bolted it in place:
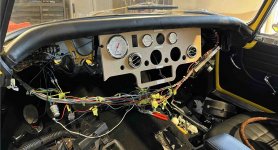
Looks really good! The A/C unit will mount about an inch or so behind the dash (with some sort of foam seal between it and the dash outlets). It will pretty much be hidden. Good outlet position for the passenger and not bad for the driver. I didn't have the lower switches mocked up at this point.
Next step is to mount the A/C unit and see if everything looks OK.
I'm very pleased with how this is coming along.
Rick
I bought the Vintage Air under-dash unit. This is heat and A/C:

And of course we must take things apart:

The idea is to mount the unit behind the new dash and put the outlets in the dash. The controls would also be mounted in the dash. So it is sort of like taking the whole front panel from the unit and mounting it in the dash. But I don't want the look of a separate unit poking through the dash, or hanging under it.
I modelled the original dash on the computer and then modified it to suit. This is what I have now. The ends are unchanged from the stock dash. The changes start where the dash drops down for the vents and radio:

This incorporates the gauges that are currently in the dash, the A/C vents and controls, a place for a radio, and places for the various switches. I've always liked the look of rocker switches on a dash (love the XKE's with the long row of rocker switches!). I bought these switches from New Wire Marine:

They come in various electric configurations depending on how many circuits you want to control and how you want them controlled. And the neat thing is that they have dozens of different switch covers with various labels, but you can also create your own. You mock it up on their website and they make it. The head light and defrost are custom ones I did.
The plan is to have the headlight switch at the top near the small gauges, the wiper and washer beside the radio, and the defrost and a blank on the left. That of course may change, but that's the plan right now.
To see how this looks and fits I made a mockup of it. I realize the dash outside of the central part is not changing, so no need to mock that up. I made a centre piece from cardboard and mounted some of the gauges and bolted it in place:

Looks really good! The A/C unit will mount about an inch or so behind the dash (with some sort of foam seal between it and the dash outlets). It will pretty much be hidden. Good outlet position for the passenger and not bad for the driver. I didn't have the lower switches mocked up at this point.
Next step is to mount the A/C unit and see if everything looks OK.
I'm very pleased with how this is coming along.
Rick

