New Headliner

KenF

Gold forum user
Messages
396
I'm installing a new headliner on my hardtop while I've got it apart.
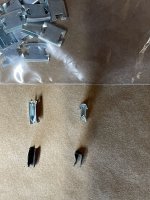
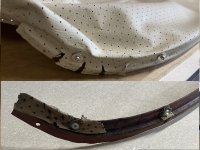
Each of the furflex pieces has 3 small screws to help hold them on.
Did the factory do that? Or is this someones fix done later on? They are PosiDrive screws.
IMG_8181.JPG


This should be fun. :sneaky: I've seen the YouTube video of the red Alpine top being done, but not much else out there. Hopefully it turns out.
 

Austin Healer

Gold forum user
Messages
1,392
I've more commonly seen them installed with alloy pop rivets... 3 per side.... the Alpine parts list does show the furflex, but doesn't list how it's secured.... either screws or rivets... I suppose it could be either. But the Pozi screws are a good indicator of originality. not like you can go down to a hardware store and buy pozi sheetmetal screws!

the single most difficult aspect of the headliner is getting it glued to the front cleat correctly! The rest is pretty easy.
 

KenF

Gold forum user
Messages
396
Thanks, the screws will go back in. I was going to post pictures of the progress, if anyone else has a hankering to do the same project.
But only if it turns out good. If it doesn't, never mind! LOL
 

pfreen

Gold forum user
CAT Member
Messages
420
Thanks, the screws will go back in. I was going to post pictures of the progress, if anyone else has a hankering to do the same project.
But only if it turns out good. If it doesn't, never mind! LOL
Please do. I still have that to do.
 

KenF

Gold forum user
Messages
396
Okay, the headliner install is not done yet, but I think it’s going to turn out fine. So I’m going to post what I did. I like to see a lot of pictures for DIY projects, so hopefully you won’t get sick of this long headliner thread. I’ll reduce the size of the pics to save storage space.

First off, I’ve never done this before on a Sunbeam, but have done a few Mustangs, etc. Secondly, I’m sure if I were to do this again, I’d probably do it different, and better. This is only the way I did it, which was a learning experience. I’m sure the experts would do it a bit different.

Here are the most used tools:
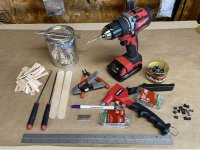
IMG_8245.JPG
  • Rivets and rivet gun.
  • 1/8” drill bit to remove rivets. I think I riveted the front cleat 3-4 times before getting it right.
  • My wife’s fabric pen that easily wipes off the material, maybe too easy.
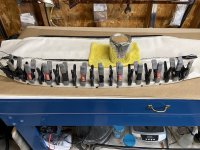
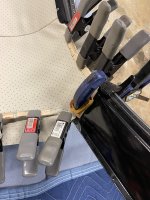
  • Spring clamps, a bunch. I got these at Harbor Freight, and they really have a lot of pressure. Make sure the clamps are clean so they won’t leave marks on the headliner.
  • Poker to locate holes and punch through the vinyl.
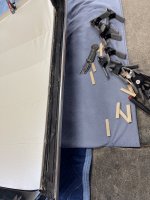
  • I cut some paint stir sticks ½” x 2” to help hold headliner flat against the flange when gluing.
  • Small spring paper clips just to hold while adjusting fit.
  • Good glue.
Hardtop will need to have the rear and quarter windows removed, the side furflex pieces, and latches.

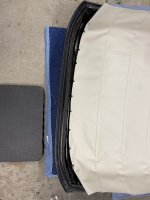
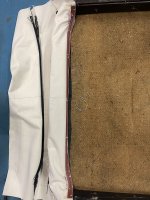
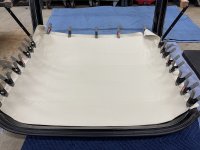
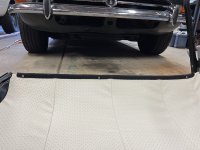
I tried to remove the headliner in one piece, just in case I needed to refer to it later. Take plenty of pictures, you can always delete them later. I’m pretty sure this was the original 55+ year old headliner. It was stained a lot, and had a couple tears near the top latch area. Get some thick soft blankets to lay it on.
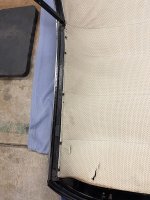
IMG_8191.JPG

Who knows how long the new headliner (from SS) has been folded up in the box. So, get it out and let it rest. The wrinkles won’t come out until you start stretching it. I even put it in the dryer on low heat for 5 minutes, not much help. And the weather hasn’t been cooperating enough here to set it out on the sun.
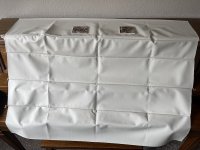
IMG_8193.JPG

Here it is after drilling the rivets out of the front cleat. It's a good idea to put something like a thin stir stick or metal underneath the rivet as you're drilling it, to keep the drill bit from hitting the body metal as it breaks through the hole. The old jute was in good condition, and still attached pretty good to the top. I did lift it up around the edges mostly to check the top for rust. etc., fortunately looked great. I then used some spray trim adhesive to get the jute stuck back on the metal.
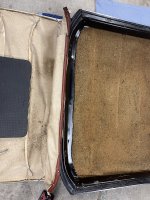
IMG_8199.JPG

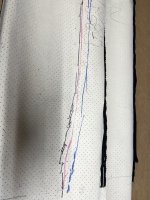
Here is the front cleat, and the bows. I think the correct term for the loop on the headliner is 'listing,' and these are 'listing' rails. Keep them in order, the id paint on mine was very faint. From front to back it should be blue, green, red, then yellow. I marked mine with a permanent marker, which quickly came off after handling. So I center punched dots on the ends of mine. Also clean them with steel wool so they slide easier through the headliner.
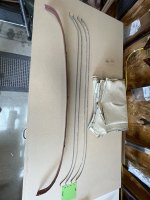
IMG_8203.JPG

I also marked with thin tape where the listing ended on the old headliner. The new headliner comes with the listing longer than the rods, and needs to be trimmed. I cut the front listing at 18" from the headliner centerline, and a little bit longer at the back, 18 3/4". I did make a heavy paper tracing of the bows, just in case anyone may need that in the future.
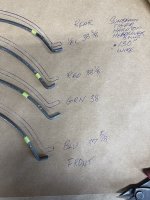
IMG_8233.JPG

Next up will be getting that front cleat glued up. As Sean mentioned, you have to get that right or it will look like crap. It took me a few tries to finally get it decent.
 

KenF

Gold forum user
Messages
396
Okay, I have to show the mistakes too. Look at how many lines I had drawn to mark where to fold the headliner around the front cleat! What a joke! :oops:
IMG_8215.JPG

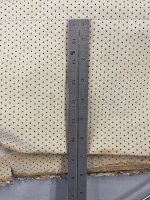
I finally wised up and measured my old headliner, from the center of the front seam to where it wraps around the front cleat (6 ¾”) and marked that location on the new headliner as a starting point.
IMG_8235.JPG

I then laid headliner down, with bows in place, clamped taught at the rear window opening, centered.
IMG_8217.JPG

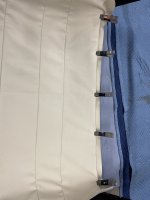
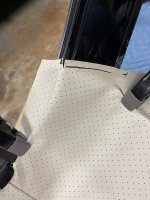
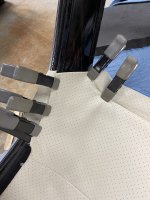
The new headliner already had the centerline marked on the back side. I marked the centerlines at the rear window opening, and the front cleat, which is at the tab and square hole. I placed the cleat loosely in position, wrapping the headliner around it (at 6 3/4" at center), and pulling from the center outward and forward to get rid of most of the wrinkles. I used the small factory clips (I only have 11) which do a good job of holding headliner onto the cleat as you pull and adjust to get it where you'll need to glue it. The perforated holes are a good guide to keep both sides of the headliner stretched the same, at least on mine. I ignored the 6-8 inches curves at each end, for now, and decided to glue the center area first, then work on the ends as another step.
IMG_8220.JPG

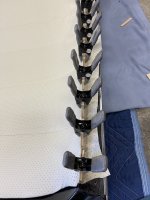
Speaking of clips, SS sells them, but they have teeth which will rip into the new headliner, and I didn't feel like using them. But the factory clips work great! Wish I had more, only had 11. My top had 4 on one side, 5 on the other, and only 2 in the back.
IMG_8221.JPG

Here’s the gluing of the headliner to the center of the cleat, but not the ends yet.
IMG_8222.JPG

After the glue dried, I riveted the cleat to the top, installed bows into holes and clamped tight at the back window opening and sides. Verified the bows were vertical, and at least the center area and sides of the headliner were tight. I then moved to the unglued ends of the cleat and stretched headliner outward and forward tightly around cleat while holding cleat down where it will eventually be riveted. Be careful not to rip headliner here at the ends.
IMG_8232.JPG

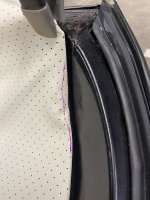
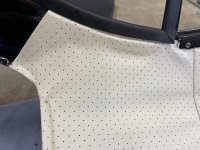
Mark the front edge of the headliner and use that mark to glue the rest of the headliner around the cleat ends. I then drilled out the rivets and glued the headliner to the cleat ends. The cleat ends have somewhat of a weird curve to stretch the headliner around, including a small concave section, which is shown underneath the purple disappearing ink. I couldn’t get the headliner tight near these areas since there’s nothing for it to pull against.
IMG_8237.JPG

So I decided to cut a few relief cuts and re-glue it taking up the slack to that mark. I didn't see this on the original headliner, I guess they were better at this. Also each end of the cleat had 2 places where headliner was originally riveted to it, as shown in the old picture. Instead of plastic washers I just used aluminum rivet washers. I put the rivet head on the side where the new headliner will fold over, towards the interior. Didn't want the longer sharp side of rivet hanging down above the finished headliner, potentially a hole maker. I think I test fitted at least 4-5 times to make sure the cleat was glued right. If it's not right, take it an apart and redo it, which I did once or twice.
IMG_8243.JPG

Next will be setting headliner in place and gluing the edges. Hopefully wrinkle free, mostly.
 

KenF

Gold forum user
Messages
396
Okay, last time for riveting that cleat in. Put the bows in place, stretched to the rear center first, then the sides, then the rear again. Be sure to center the headliner at the rear.
IMG_8244.JPG

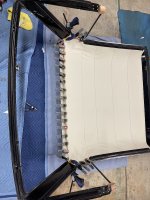
Glued the sides using those wooden sticks to hold the material flat against the glue. On the front corners I trimmed off the side material coming from underneath the cleat at the very corner so it wouldn’t have a double layer folded over the side flange. I also marked on the weatherstrip area where the 3 holes are for the furflex so I can easier find them later. I didn’t glue the rear yet at this point.
IMG_8247.JPG

After the glued dried, trimmed the lose material by running a blade down the inside corner.
IMG_8248.JPG

Put a few of original clips back over the flange. I located the furflex screw holes on the flange but ended up just drilling new holes through the furflex and flange, easier. Had to slide a small flat screwdriver through new furflex to slightly open the slot just a bit, and clear the metal ends where they’re cut. Once in place, pound a few times with a rubber mallet, and drill new holes for your screws or rivets.
IMG_8252.JPG

Tomorrow will be the rear and quarter window areas.
 

KenF

Gold forum user
Messages
396
Trimmed headliner straight across the b pillar about 5/8” width, then up so it will fold over quarter window opening. Decide where you want to fold under at the rear pillar, I used the old glue line and pictures as a reference. In hindsight I should have laid down some blue painter’s tape where I wanted the end of the headliner to be next to the upper rear window. Trimmed material a ½” extra to fold under.
IMG_8249.JPG

Also made a relief cut into the upper corner of the rear window so material could transition the corner. Test fit.
IMG_8250.JPG

Stretched and glued the back first, then the corners.
IMG_8255.JPG

Glue the edges and folded under flap, stretch and clamp.
IMG_8254.JPG

Put the quarter window seal back in.
IMG_8256.JPG

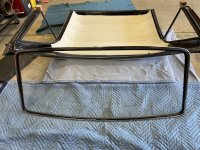
And the fun part the rear window.
IMG_8258.JPG

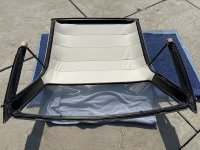
Bake in the sun, hopefully it will tighten up a little.
Not too happy with the way it looks now, maybe I’ll tear it apart and do it again.
I knew I shouldn’t have started this thread. :cautious: LOL

IMG_8259.JPG
 

bernd_st

Gold forum user
CAT Member
Messages
316
A very nice article. Thanks. I know what a real "pig" the replacement headliner is since I tried myself, but paused when I even couldn't get the front fixation right. The material is very stiff and even with heat it doesn't shape as you want it. Lots of ripples too. Will leave it to a professional now since it will wreck my nerves...
 

ABSunbeams

Gold forum user
Messages
116
Nice article. My headliner looked the same as yours with the same wrinkles. After trying different methods to get wrinkles out from using a hair dryer with minimal results. Resorted to a heat gun (650-1100 degree variety)and moving it at a rapid pace, not staying in one place of course and keeping it about a foot away. The fabric softens up when heated wrinkles disappeared when cooled off. I had reached a point were I was going to try another liner but this worked for me. The professional way is the best but it seems we are all in a learning mode and like the “adventure”.
They riveted the sides which holds the perplex in place, same rivets as the S/N tag. Some may have been screwed but the ones I have are that way and have not been restored. If that matters
 

Austin Healer

Gold forum user
Messages
1,392
Like I said. I've seen them with the rivets as well.

as for wrinkles, an upholstery steamer will eliminate most of them.
 

michael-king

Gold forum user
CAT Member
Messages
4,152
Like I said. I've seen them with the rivets as well.

as for wrinkles, an upholstery steamer will eliminate most of them.
What... You don't need Nivea or some such... We should tell all the ladies using cosmetics.. upholstery steamer 😜
 

65beam

Gold forum user
CAT Member
Messages
1,841
Nice article. My headliner looked the same as yours with the same wrinkles. After trying different methods to get wrinkles out from using a hair dryer with minimal results. Resorted to a heat gun (650-1100 degree variety)and moving it at a rapid pace, not staying in one place of course and keeping it about a foot away. The fabric softens up when heated wrinkles disappeared when cooled off. I had reached a point were I was going to try another liner but this worked for me. The professional way is the best but it seems we are all in a learning mode and like the “adventure”.
They riveted the sides which holds the perplex in place, same rivets as the S/N tag. Some may have been screwed but the ones I have are that way and have not been restored. If that matters
The local shop will install the bows in their proper location and then secure the headliner in place at four locations. The center at the front and back and the center of the two sides. Then using the steam gun they work outward to the corners and work out wrinkles as they move on. This process keeps the bows in the proper location.
 
Top