Engine drop plan - and progress

ktwhite

Silver forum user
CAT Member
Messages
46
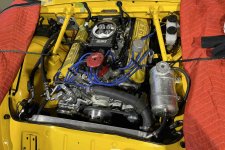
Mounted the cooling fan and the rest of the cooling system. I wanted to run the engine until it warms up to check for leaks or any other issues before putting the suspension cradle back in. The alternator is swapped to the other side in preparation for the A/C compressor to go on the right side.

View attachment 19553

I cut the rad opening to better match the size of the rad. Also cut some sheet metal away to mount the fan.

View attachment 19551

View attachment 19552

The engine ran well. One small coolant leak from where the thermostat housing bolts to the intake manifold. As they say, an easy fix. No oil leaks or any other concerns.....except...

The electric cooling fan blows a lot of air when testing it. But with the rad in front of it (I have a Griffin rad), the flow is cut down to the point that it is hard to tell that air is blowing through the rad. This is what I have now:

View attachment 19554

View attachment 19555

I'll do some research to see if there is a better one I can get. I do remember the long article on testing all the various cooling mods on a Tiger found that fans with straight blades worked the best. Maybe the curved ones are mainly to quiet it down? Fans on turbofan engines a basically straight, so maybe that says something? Maybe a shroud around the fan would force more air through the rad. I'd like a fan powerful enough to move the car!

Anyways, I can go ahead with things which is good.

Rick

Edit: After looking around a bit, I'm thinking of this fan with a shroud; https://www.summitracing.com/parts/prm-19114
I recommend the Spal fan below. It is very strong and moves a lot of air. Spal fans use more amps at start but once running normal. Most electric fan manufacturers are a liberal on the cfm. Spal fans are very true to cfm. This fan also has a very open shroud area so not to block air traveling through radiator when fan is off. They make a few sizes in this series. They cost more but well worth it.
Summit catalog Manufacturer Part Number: SPU-IX-30102040.
 

Carbuilder

Gold forum user
Messages
113
Thank you very much for that. I did some more research on fans and it does seem like Spal makes the best...or at least they are honest about the performance of them. Very good information on their fans here:

https://static.summitracing.com/global/images/technicalarticles/spu-ix30103147.pdf

It does conclude what the long article on testing different fans on the Tiger concluded. The straight blade ones do move more air than the curved blade ones but they are louder. They also perform better at "increased static pressures". I think that means with more restriction to the flow (which would be my case).

I'm going to order the Spal 14" pusher, straight blade.

Edit: I was mistakenly looking at the various Spal 16" fans, which do state a higher CFM for the straight blade one. Since I need a 14" I ordered one of those. The strange thing is that the curved blade one has a higher CFM rating than the 14" straight blade one, so that's what I ordered. I think it may be that the 14" curved blade one has a more powerful motor (drawing more amps) than the straight blade one.
 
Last edited:

Carbuilder

Gold forum user
Messages
113
Put the front suspension cradle back in. What a huge PIA! Took about 5 hours sweating and swearing in equal amounts.

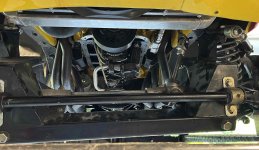
Remember my car has a Hokanson front suspension and a newer roller lifter 302. The suspension cradle goes in with 4 bolts, so how long can that take? I managed to get it out, but now I'm not sure how. I wiggled it around and it dropped out. But it is a lot easier to drop something out that weighs a couple hundred pounds than it is to lift it back in. Here is the issue:

Screenshot 2024-07-01 at 8.25.42 PM.jpg

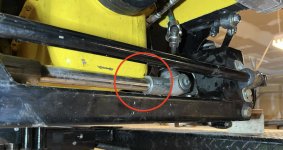
The upper control arm bushing housings are closer in than the frame at that location. The frame was already ground away somewhat and before I started the re-install I ground about another 1/8" off each side. I didn't want to take more off as this seems to be a pinch weld with a number of pieces coming together. So the suspension cradle cannot just be lifted up into position. The space does widen out a bit as you go back, so shifting the cradle backward gives more room here. BUT...

Screenshot 2024-07-01 at 8.25.26 PM.jpeg

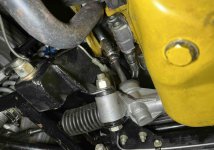
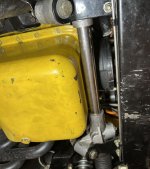
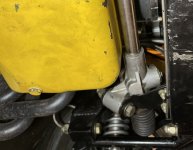
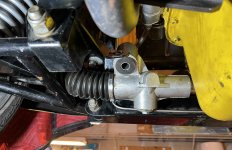
The steering rack hits the oil pan before the cradle can move back enough to make a difference. Maybe it is because my oil pan is pretty deep? So I seemed to be stuck. Keep in mind this is a very heavy piece and it constantly wants to roll forward since there is most of the mass at the front.

The only thing I could see was to take the oil pan off to gain clearance (hoping I would be able to put it back on after). So I drained the oil and removed the pan:

Screenshot 2024-07-01 at 8.26.02 PM.jpg

That did give enough clearance to move the cradle rearwards, lift it into position (actually, lower the car onto it) and move it forward again. I put 2 bolts in and then thought I should try to install the oil pan. Nope, couldn't get it back on at the front. Lots of cursing at this point.

I supported the cradle to hold it in this position, removed the bolts, and pushed it forward about 1". Installed the oil pan, moved the cradle back, and put the 2 bolts back in. While quitting for the day I wondered if it might have been easier to loosen the steering rack rather than remove the oil pan? Hopefully I'll never have to do this again to find out.

Obviously I dropped the engine/tranny out the bottom. The tranny is a T5 that is trapped in the frame until it is moved forward around 10"; hence the rad and water pump had to come out to make room for that. So should I ever have to remove the engine again, I would seriously look at removing it from the top and leaving the suspension cradle in. I think about the same amount of hardware would have to be removed to get the engine out, so no harm in trying.

So it is almost done now, but what a pain!

Rick
 

sandy

Gold forum user
CAT Member
Messages
373
Welcome to the club of fitting things in the Tiger. I have the same front end and had to move the engine back to clear the pan. Mike should have had some adjustment in that area. The same area hit. I was going to cut the rack off and move it forward a bit as their was room but since I had to hack up the firewall and I had made the motor mounts adjustable was much easier, it's still close but can get the engine in and out with only a little fuss. Same problem with the cross shafts hitting, get cRaZy with the grinder is all I can say :)

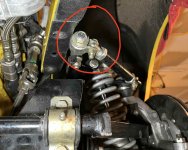
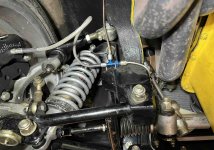
I had much of the same issues, couple of minor things, that is still pending is the brake line T fitting. It's right in the way of steering or the headers so you can't get a line unless a -3 90, which is OK except I want to run hard line to the cross member. So a bit of work to fix that, but not major. BTW I don't EVER expect anything to go easy on the Tiger, so when I have to do the dirty work, it's just par for the course!

Great progress.

Sandy
 

Carbuilder

Gold forum user
Messages
113
I appreciate that Sandy, and the help on this thread.

Looking at the front end again, maybe removing the bolts holding the steering rack in place might allow it to move rearward enough to clear the oil pan while moving the cradle enough to install without the interference on the cross shafts. Maybe.

Don't know if this will help you, but mine has a hard line for the front brakes. Here you can see how it runs. Clears the header and the steering components.

Screenshot 2024-07-09 at 7.38.58 PM.jpg

Screenshot 2024-07-09 at 7.38.37 PM.jpg

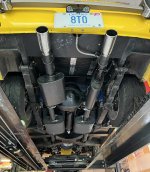
I found the engine too loud right from the start. It was a 426 HP engine, so obviously it is't going to be quiet, but I wanted it quieter than it was. It came with 2 1/2" pipes with one straight through muffler in each pipe. I replaced those with chambered mufflers. It helped, but not much. With the engine now toned down a bit, power-wise, that should make it a little quieter. BUT...

Since I removed the extra gas tank that was under the raised trunk floor, and had the mufflers I took off it, I added those back on in the area under the trunk:

Screenshot 2024-07-08 at 8.29.53 PM.jpg

The reason they are not both on the same angle was to align the tail pipes. Not sure why exactly it needed that, but they don't show when the car is on the ground. I just ran it briefly in the garage so hard to tell how much difference it made. I asked my wife, who was in the house at the time if she heard the Tiger running. She said she didn't so that must mean it did make a noticeable difference. I'm not concerned with a bit of a drop in power.

So now a lot of the work will be on the A/C system which I have a separate thread on.

Rick
 

Carbuilder

Gold forum user
Messages
113
Engine removal with Hokanson front suspension

The engine has to (sort of) come out again. I have an issue with the clutch and have to get at it. I'm hoping to do this without removing the front suspension cradle, but not sure yet if that is possible.

The issues:

The steering rack is right in front of the oil pan, so the engine can't move forward without being lifted about 5":

Screenshot 2024-08-26 at 7.47.21 PM.jpg
I tried removing the steering rack but don't think that can be done with the engine in place; at least I couldn't do it.

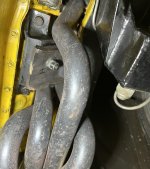
And of course the headers wrap around the engine mounts, so they have to move as a set:

Screenshot 2024-08-26 at 7.47.45 PM.jpg

I need to access the clutch, so my initial thought was to just move the tranny back. But the frame in that area is modified in my car (not sure how much since I don't have a stock one to compare). My transmission is a T5. I removed the bolts from the rear of the bell housing and the transmission moved back about 1 1/2" before hitting the transmission tunnel. The tranny input shaft is around 7 or 8", so something has to move that much if I need to get the clutch out.

I removed the engine mount bolts from the engine, undid the header bolts on the right side of the engine. Removed the rad and am currently removing the A/C condenser and the electric fan. That should allow the engine to move forward enough to get at the front bell housing bolts; whether it can be completely removed I'm not sure. Of course the engine will have to be lifted quite a bit at the front to move forward and I don't know if that can happen. I'll take the weight of the engine on the hoist, remove the left side engine mount at the frame. That should allow the right side header to stay in place, and the left one to come out with the engine. That's the plan anyways.

I'm really trying not to remove the suspension cradle, by removing the engine from the top. Worse case, to move it out of the way to allow the engine to move forward, maybe I can undo the bolts and let it drop down a few inches without it actually coming all the way out. It is a very heavy, very awkward piece of hardware to maneuver around.

I have a front sump oil pan. I've looked at the Fox body Mustang pans that are a dual sump, with a smaller sump at the front; has to have one there to clear the oil pump. That might help with removing the engine since it wouldn't have to be lifted as much. I'll look into that for the next time the engine has to come out.

Any suggestions would be appreciated, but the odds of someone having the same components as me are likely slim.

Rick
 

sandy

Gold forum user
CAT Member
Messages
373
Ran into issues with the hokenson front end with an aviaid oil pan for the Tiger, no way it could work with the front kick out. Had them make a flat faced front of the pan and it still hit the rack a bit too much same as the stock one.

Had to pull the full suspension off. I don't remember if you can drop the rack due to the way it's mounted when that tight against the pan. Thought about making the mount adjustable but was easier to make new motor mounts to slide the motor back a bit. That was the start of the chain reaction of cutting the firewall back and removable X brace for the transmission. My instructions to the guy that did the work was "cut as much as you need to make it drop in the top...". I had enough of trying to fit the engine and transmission in.

I think for sanity you have to drop the suspension, maybe you can wiggle it out, but you will be fighting it. Even with all the hacking I just hit the casting part of the rack when pulling or putting. Lots of hoist and angle on the carb lift plate finally gets it popped past the pan hitting it, then easy from there.

Can't remember if you said you couldn't get at the motor mount bolts, or you pulled them off the engine, not sure, but you can pull the three in each of the fender wells not sure it it could help.

On the stock 260 that came out I think I pulled the 6 bolts to the motor mounts and slid the motor down and out with suspension removed. Car had iron manifolds so a bit different.

I'm having an anxiety attack thinking of it now 😃
 
Last edited:

spmdr

Gold forum user
CAT Member
Messages
387
From my limited Hokenson FT end fitting,

It's best to remove the rack and swaybar

to put the crossmember on the car.

You can do it with the swaybar in place but

it is just over all easier rack refitting with the swaybar

off.

Also, for future service, it is best to have the rear

lower A-Arm bolts going in from the front

as well as the rack bolts going in from the bottom.

DW
 
Last edited:

Carbuilder

Gold forum user
Messages
113
I could not remove the steering rack with the engine in place. The way it is mounted it can't move down since the rack hits the oil pan right away, it can move up enough to get the mounting areas clear of the frame tabs, but can't move it side-to-side enough to get it out.

Screenshot 2024-08-28 at 10.08.25 AM.jpg

If I can lift the engine enough at the front (has to be about 5" maybe) then it can slide forward quite a bit. But not sure if I can do that without the rocker covers or the bell housing hitting the firewall area. It needs about 9" of forward movement to get the tranny out of the tunnel.

As a friend of mine said when looking it all over "works well when assembled, but can't be assembled".

I can get at the engine mount bolts OK. I'll see how things go today and report back. Cars are so much fun.
 

Carbuilder

Gold forum user
Messages
113
Of course nothing really went to plan. I did discover that the lower mounting plates for the steering rack can be removed, so I took them off thinking that would get the rack out.

Screenshot 2024-08-29 at 9.33.34 AM.jpg

Doesn't help. The tie rods are in the lower control arms so the rack can't be lowered. I removed the sway bar but that didn't get me any further either. The engine can't be raised enough to get it past the steering rack, even with the rack loose.

I thought I could be clever and lower the front suspension cradle just a little without completely removing it. The 4 attachment bolts have long threaded portions, so I undid them about 1 1/2" to lower the cradle that much....didn't work. I forgot that it hangs up on the inner, upper control arm pivots on the frame after going down about 1/2". I'll see if that small added clearance helps in any way with getting the engine forward. Wishful thinking. Failing that, the cradle has to come out.

Rick
 

Carbuilder

Gold forum user
Messages
113
Did get the engine out. I had to remove the front cradle, but left it on the lift so hopefully it will be easier to reinstall. I moved the engine/tranny forward enough to get the bellhousing-to-engine bolts out. Moved the tranny back into the tunnel and removed the engine from the bottom. To reinstall it I'll remove the tranny and bolt it to the engine first.

Does not appear to be an easier way to remove the engine with the Hokanson front suspension, and the transmission tunnel mods that I have.
 

spmdr

Gold forum user
CAT Member
Messages
387
I have gained a bit more Hokey front end

experience, lately.

I replaced/exchanged racks on a car

with a bigger oil pan than stock.

I actually installed the second rack

twice. I took it out to mod the rack

casting for more oil pan clearance.

It was clearly a case of moving it around

until it comes OUT. To explain EXACTLY

how to twist and turn if aint happening

anytime soon...

Because When it happens, it seems more

MAGIC than skill or Art....

It does help to remove the drivers side

tierod end.

DW
 

sandy

Gold forum user
CAT Member
Messages
373
I'm not sure of the issues you both have, but I had no issues dropping the front end out of the car prior to having the firewall cut back. I could be missing something but don't remember it being a problem other than the rack hitting the front of the stock pan. I think that is just where he located the mounting holes and not having the rack position being fixed. I'm going to be pulling it again I think (maybe not) but will report back.
 

Carbuilder

Gold forum user
Messages
113
I didn't have a problem removing the suspension cradle, but I had a problem putting it back in. I did have a problem with trying to remove the engine without dropping the cradle.

The issue with the cradle that I found is that it is very top heavy. So it was always trying to tip around and not keep the bolt holes at the top. I think with some sort of simple wood contraption to keep it in the position to fit back will make it much easier.

Clutch issue is solved so the engine will be going back in soon.
 

IvaTiger

Gold forum user
Messages
600
I didn't have a problem removing the suspension cradle, but I had a problem putting it back in. I did have a problem with trying to remove the engine without dropping the cradle.

The issue with the cradle that I found is that it is very top heavy. So it was always trying to tip around and not keep the bolt holes at the top. I think with some sort of simple wood contraption to keep it in the position to fit back will make it much easier.

Clutch issue is solved so the engine will be going back in soon.
The way I reinstalled my standard original front crossmember was to drop 3/8 all thread down the 1/2-20 threaded tubes that the 4 bolts attach to then draw the crossmember up to its mounting on the chassis rails using 3 out of the 4 tubes The tube without the all thread coil then accept the 1/2-20 bolt with a little jostling, have a very slight snug to that bolt and remove the thread rod kitty corner and insert another 1/2-20 bolt.
Be very careful that the bolt does not drip into the box section of the crossmember before the threads are engaged !
Hope this helps
 

Carbuilder

Gold forum user
Messages
113
That is a very good idea for installing the cradle; I'll give that a try. No issue with dropping a bolt with this cradle since they go up from the bottom and dropping it just means hunting around the floor for it. Might be able to do it with just 2 rods, one at each opposite corner.

Thank you!
 

Carbuilder

Gold forum user
Messages
113
Got the front suspension cradle back in, and it was pretty easy!

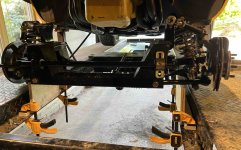
I made some wooden supports to hold it in the correct position for installation. That made a huge difference.

Screenshot 2024-09-27 at 8.12.40 PM.jpg

It rests on the lower A-arms and I could move it around to line up with the mounting holes in the frame. I lowered the car, inserted some rods through the bolt holes in the car and the cradle, continued lowering the car and it lined up perfectly. Took the rods out and the bolts went right in.

If I was doing it on the ground I would join the 2 pieces with a board and put some small wheels on it. That way the cradle would be lowered on to it, removed, and then wheeled away. I'll do that with the ones I have if/when I have to take the cradle out again, but put some teflon siders on the bottom of it to slide on the lift ramps. Now a bunch of systems to be hooked back up and I'm back in business.

Rick
 

Carbuilder

Gold forum user
Messages
113
Engine install just about done. Before the cooling system was installed I started the engine briefly to make sure the clutch and shifting worked this time. Drove the car back and forth a few feet....everything good! The clutch released about 2" off the floor, so there is room to play with the pedal ratio if I want to later; less effort if I modify the pedal/pivot point.

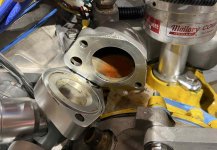
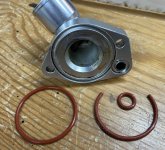
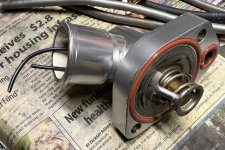
Installed and filled up the cooling system and had a bad leak (that was a little leak previously). It is the thermostat housing. Took it off and saw that the O-rings were very flat and not protruding much from the surface of the housing. Not easy to find the correct size rings for that. Every kit of rings I found has the small one too small a cross-section and doesn't have large enough ones for the larger one. I have some on order that should work.

Rick

Screenshot 2024-11-11 at 10.12.18 AM.jpg

Screenshot 2024-11-11 at 10.12.42 AM.jpg
 

sandy

Gold forum user
CAT Member
Messages
373
Nice! I had one of those swivel on the Mustang, always paranoid about the oring. Have a spare in stock just for piece of mind.

Easier to get the replacement from Summit if you know the brand, otherwise McMaster will have them, but you will have a bag with lots of spares :)
 
Top